In this article, we will be exploring how to use PyTorch in C++. The Python has lots of overhead and baggage when using in application where the performance is critical, for example in game engines, embedded device application, use of python as front end is bad.
The Pytorch provides us C++ front-end APIs and library to write ML application in a static compiled language. You can find documentation here
In this article, we will be using Bazel to build a C++ project which can use Pytorch APIs. The main goal is to read a ML model that has been exported from Pytorch (python) using a C++ application.
Prerequisites
- Install bazelisk and check if you can print the version. Installation instruction can be found here
(base) gokul@gokul-linux-inpiron16:GGlow$ bazel --version
bazel 6.1.2
- Install python and pytorch (recommend using miniconda)
(ml) gokul@gokul-linux-inpiron16:GGlow$ python --version
Python 3.10.0
(ml) gokul@gokul-linux-inpiron16:GGlow$ python3
Python 3.10.0 (default, Mar  3 2022, 09:58:08) [GCC 7.5.0] on linux
Type "help", "copyright", "credits" or "license" for more information.
>>> import torch
>>> print(torch.__version__)
2.2.1+cu121
- Have C++ compiler installed that supports C++17.
Setting up the Bazel C++ projects
First let us create a project. Let us specify the C++17 compilation option and the bazel version to be used.
- Create a
.bazelrcand add the following
build --action_env=BAZEL_CXXOPTS=-std=c++17
- Create a
.bazelversionto mention the bazel version.
6.1.2
Now let us create a Workspace file that can download the torchscript. The workspace file is responsible for specifying the external dependencies needed for the project. It can do lot of cool stuff, with certain rules and maintains the project via online project and stops us from maintaining external dependencies locally.
- Create a
WORKSPACEfile in the root directory, with the following.
workspace(name = "bazel_example")

load("@bazel_tools//tools/build_defs/repo:http.bzl", "http_archive")

# ADDING TORCHSCRIPT DEPENDENCIES
http_archive(
    name = "libtorch",
    strip_prefix = "libtorch",
    sha256 = "9d16cc0da41e057f20c0be5f26d7418f969e857631cfcb86550ccdecfee8de60",
    urls = ["https://download.pytorch.org/libtorch/cpu/libtorch-cxx11-abi-shared-with-deps-2.4.0%2Bcpu.zip"],
    build_file = "//third_party/torchscript:libtorch.BUILD",
)
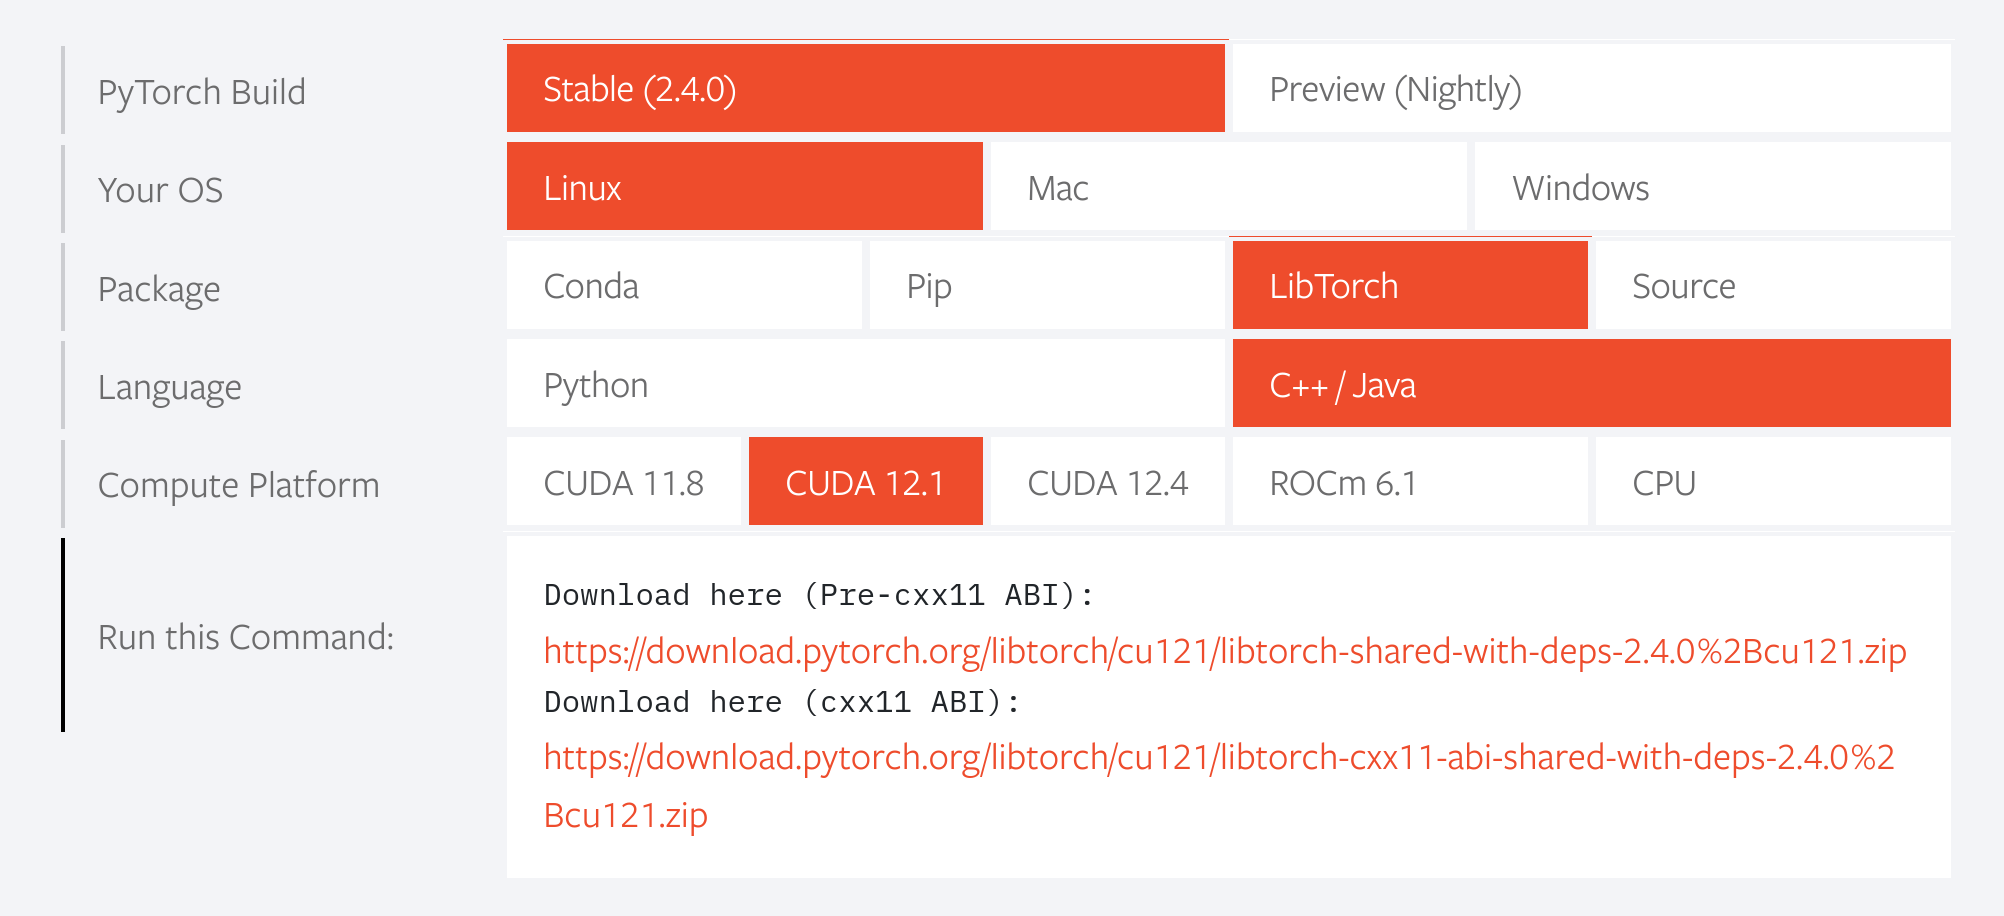
The URL and the SHA can be calculated from pytorch website: here . By Choosing libtorch package -> C++ -> Run this command (you will find link here and add it to urls in the http_archive for libtorch). For sha256, calculate it using sha256 checksum tool.
Next, we have to write bazel rules to read the torch script, shared objects, header files to add it as dependency. Create a folder called third_party/torchscript and create the following files:
- empty
BUILD. - a
libtorch.BUILDfile, to read the external library.
cc_library(
    name = "libtorch",
    srcs = [
        "lib/libtorch.so",
        "lib/libc10.so",
        "lib/libbackend_with_compiler.so",
        "lib/libtorch_cpu.so",
        "lib/libnnapi_backend.so",
        "lib/libtorch_global_deps.so",
        "lib/libtorchbind_test.so",
        "lib/libjitbackend_test.so",
        "lib/libshm.so",
        "lib/libtorch_python.so",
        "lib/libgomp-98b21ff3.so.1"
    ],
    linkopts = [
        "-ltorch",
        "-lc10",
        "-lbackend_with_compiler",
        "-ltorch_cpu",
        "-lnnapi_backend",
        "-ltorch_global_deps",
        "-ltorchbind_test",
        "-ljitbackend_test",
        "-lshm",
        "-ltorch_python",
        "-lpython3.10",
        "-lgomp"
    ],
    hdrs = glob(["include/**/*.h"]),
    includes = [
        "include",
        "include/torch/csrc/api/include"
    ],
    copts = ["-D_GLIBCXX_USE_CXX11_ABI=1"],
    visibility = ["//visibility:public"],
)
Let us create a source file, which uses pytorch C++ front-end to print the model: src/main.cpp
#include <torch/script.h>
#include <torch/torch.h>

auto main() -> int {
	std::string model_path = "./resnet18.pt";
	auto module = torch::jit::load(model_path);
	module.dump(false, false, false);

	return 0;
}
write a build file to build the src file.
cc_binary(
	name = "main",
	srcs = ["main.cpp"],
	deps = [
		"@libtorch//:libtorch"
	],
)
The resnet model is a model that has been serialized by pytorch, you can generate any pytorch model to this model file by following similar python script:
import torch

model = torch.hub.load('pytorch/vision:v0.10.0', 'resnet18', pretrained=True)
model.eval()

input = torch.rand(1, 3, 224, 224)
traced_script_module = torch.jit.trace(model, input)

traced_script_module.save("../models/resnet18.pt")
Now our project structure, should look like this:
├── src
│   ├── BUILD
│   ├── main.cpp
│   └── resnet18.pt
├── third_party
│   ├── BUILD
│   └── torchscript
│       ├── BUILD
│       └── libtorch.BUILD
└── WORKSPACE
Now we can build the project:
bazel build src:all
Now copy the model file to the location of the binary.
cp src/resnet18.pt bazel-bin/src/
Then run the binary
cd bazel-bin/src/main
./main
Thats all, you can find the part of the project in the project: https://github.com/gokulkrishna98/GGlow